
Sunday, December 23, 2012
Saturday, December 15, 2012
Fingerboard
I glued up the fingerboard before hammering in the frets. The large rubber bands made great clamps and auto centered the fingerboard. Next time out I should use brads for alignment. The fingerboard kept creeping north.

Sunday, November 18, 2012
Fretboard
I started cutting the fret slots. I made a jig to do this. The fretboard is rosewood and the fret wire is from stewmac.

Saturday, October 27, 2012
Headstock
This is my first time carving a classical headstock. I created a template for one half using plexiglas traced that and then flipped it over to do the other half. I am happy with the results. 

Friday, October 19, 2012
Maple Binding
I cut the maple binding from a block of maple I have in my shop. I completed the cutting maple binding and here I have it drying after bending, using the Cuatro as a mold. Next I will be gluing them in. Sorry for the blurry photo.


Saturday, October 13, 2012
Almost there
The tapa is glued to the body. The neck fits well. I will next remove the neck and add binding and purfling to the top. I am going to use the sam herring bone pattern as the outside of the sound hole for the purfling. I will be using maple for the binding. Maple is easy, and I have lots of it around. The bigger challenges for me will be deciding which way to go with the tuners and making sure the fretboard turns out alright....

Tuesday, October 9, 2012


Saturday, October 6, 2012
Rosette completed... same with Back-strip
I completed the Sound-hole Rosette. I used the circle cutter that I made from Oak and an old jigsaw blade converted into a knife to mark the holes and so there was no tearing when I used the Dremel in the router base for the circle. I used a pice of leftover plastic binding for the inside ring, and herringbone purfling for the outer ring. I also marked and cut the slot for the back-strip.


Sunday, September 30, 2012
Wooden rosette
I ended up making a wooden rosette from imbuia, wallnut and maple. Below is a photo of it on the tapa. 

Friday, September 14, 2012
Back and neck dry fit
Below are photos of the body. I had to add some bracing to the back, as my back was made from two halves. Two of the thumb planes in the photo I made myself.


Tuesday, September 11, 2012
Corpus
The two halves are now one. The Spanish Cedar has been cut and jointed and glued up and in need of some sanding. I have also started making the teen for the neck. I am using the method recomended by William Cumpiano on his web page for the addendum for his great book Guitar Making : Technology and Tradition. I have to trim the crazy long Tenon I cut and laminate hard wood on the sides.

Image from Cumpiano's website above:


Sunday, September 9, 2012
Sound Hole Rosette
I have some ideas for my sound hole rosette. I usually purchase from Depaul Luthier supply.


LMII has some awesome rosettes for pretty cheap.

I was also thinking of a parchment rose, but these are completely not typical of this instrument.
LMII has some awesome rosettes for pretty cheap.
Wednesday, September 5, 2012
Left side
The left half of the instrument has been cut out. I cut the back at about 1/4" thick. I left the sides at 1/2" thick as well. I am not sure yet how thick the top should be.


Monday, September 3, 2012
Cutting the back
I started cutting the back by hand. First I traced a template that I made from plexiglass. Then I cut the waste wood. The first half is almost done. 1/4 inch off the back. I also cut the neck blank from the excess wood. 


Suppliers
I wanted to add some links for some of the suppliers I use.
allied lutherie
RC Tonewoods
I will be picking up my brace wood, head plate, and probably bindings from the above companies. I will probably be making an abalone shell rosette.
allied lutherie
RC Tonewoods
I will be picking up my brace wood, head plate, and probably bindings from the above companies. I will probably be making an abalone shell rosette.
Saturday, September 1, 2012
Bridge Complete Spanish Cedar Has Arrived
So my bridge is complete and the Spanish Cedar has arrived. The Spanish Cedar measures 8"x 48"x 2". I will have to re-saw and glue up to dimensions I can use.
At this point, I realized I have no way to re-saw this wood. My band saw has a height of about 3" max. Table saw can only have a max blade height of 3", and that looks pretty scary.....
I was thinking of maybe using the table saw and then flipping the wood. So I have 2 options, buy a thin piece for a back, or figure a way to re-saw using a combo of tools.......
I planed the wood to clean it up as you can see it is pretty dingy in the photos, and it looks great!
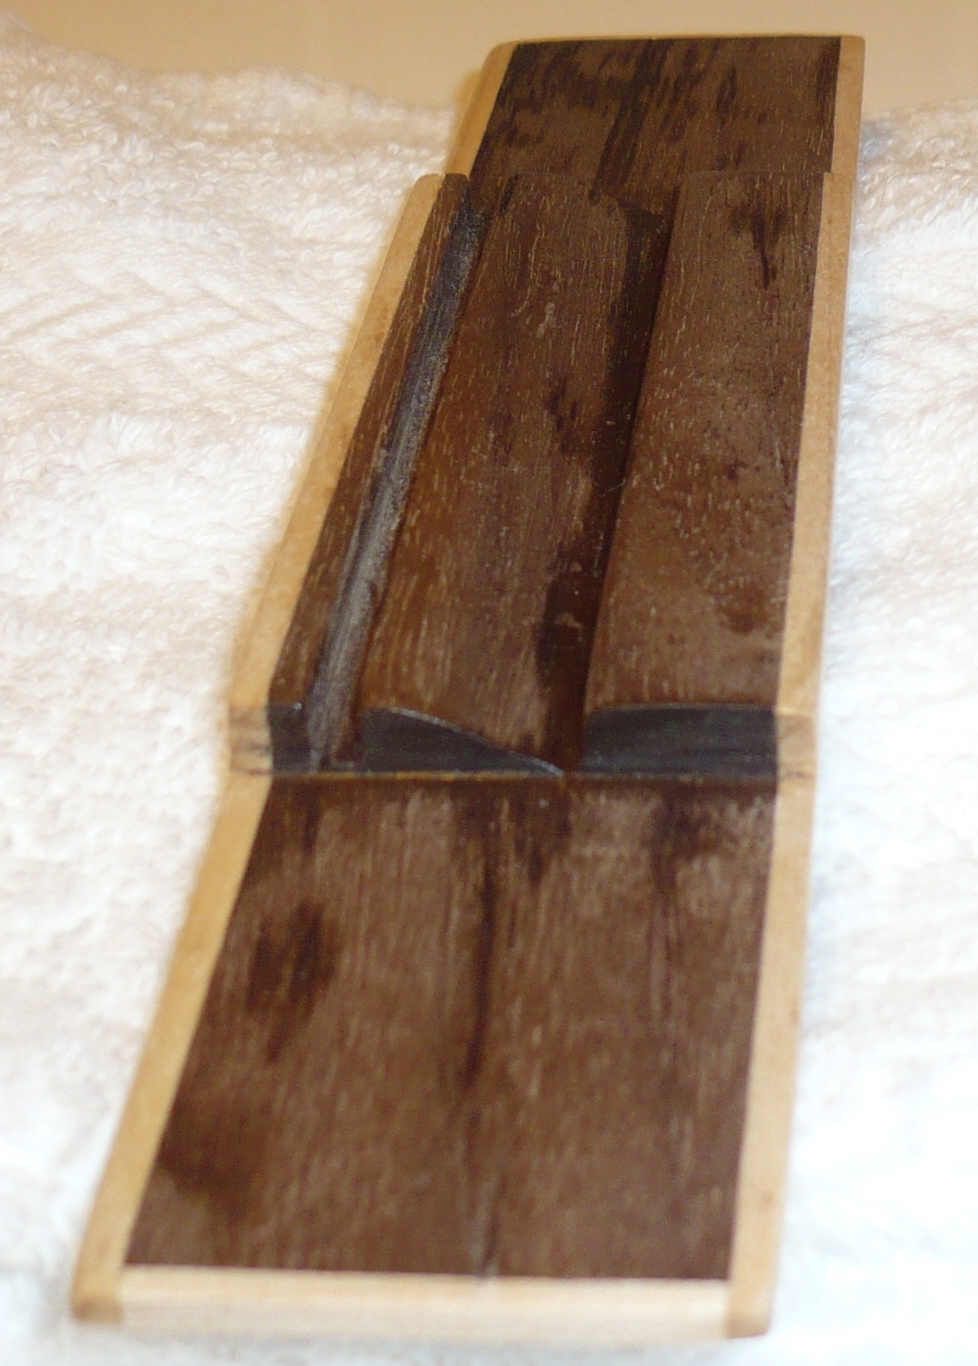
Walnut bridge lined in maple. It's still a little wet here from cleaning it with naphtha and then acetone. It still has to have holes drilled for the strings.
Un puente de nogal y forrada en madera de arce. Es todavía un poco húmeda aquí desde la limpieza con nafta y acetona. Todavía tiene que tener agujeros taladrados para las cuerdas.


Saturday, August 11, 2012
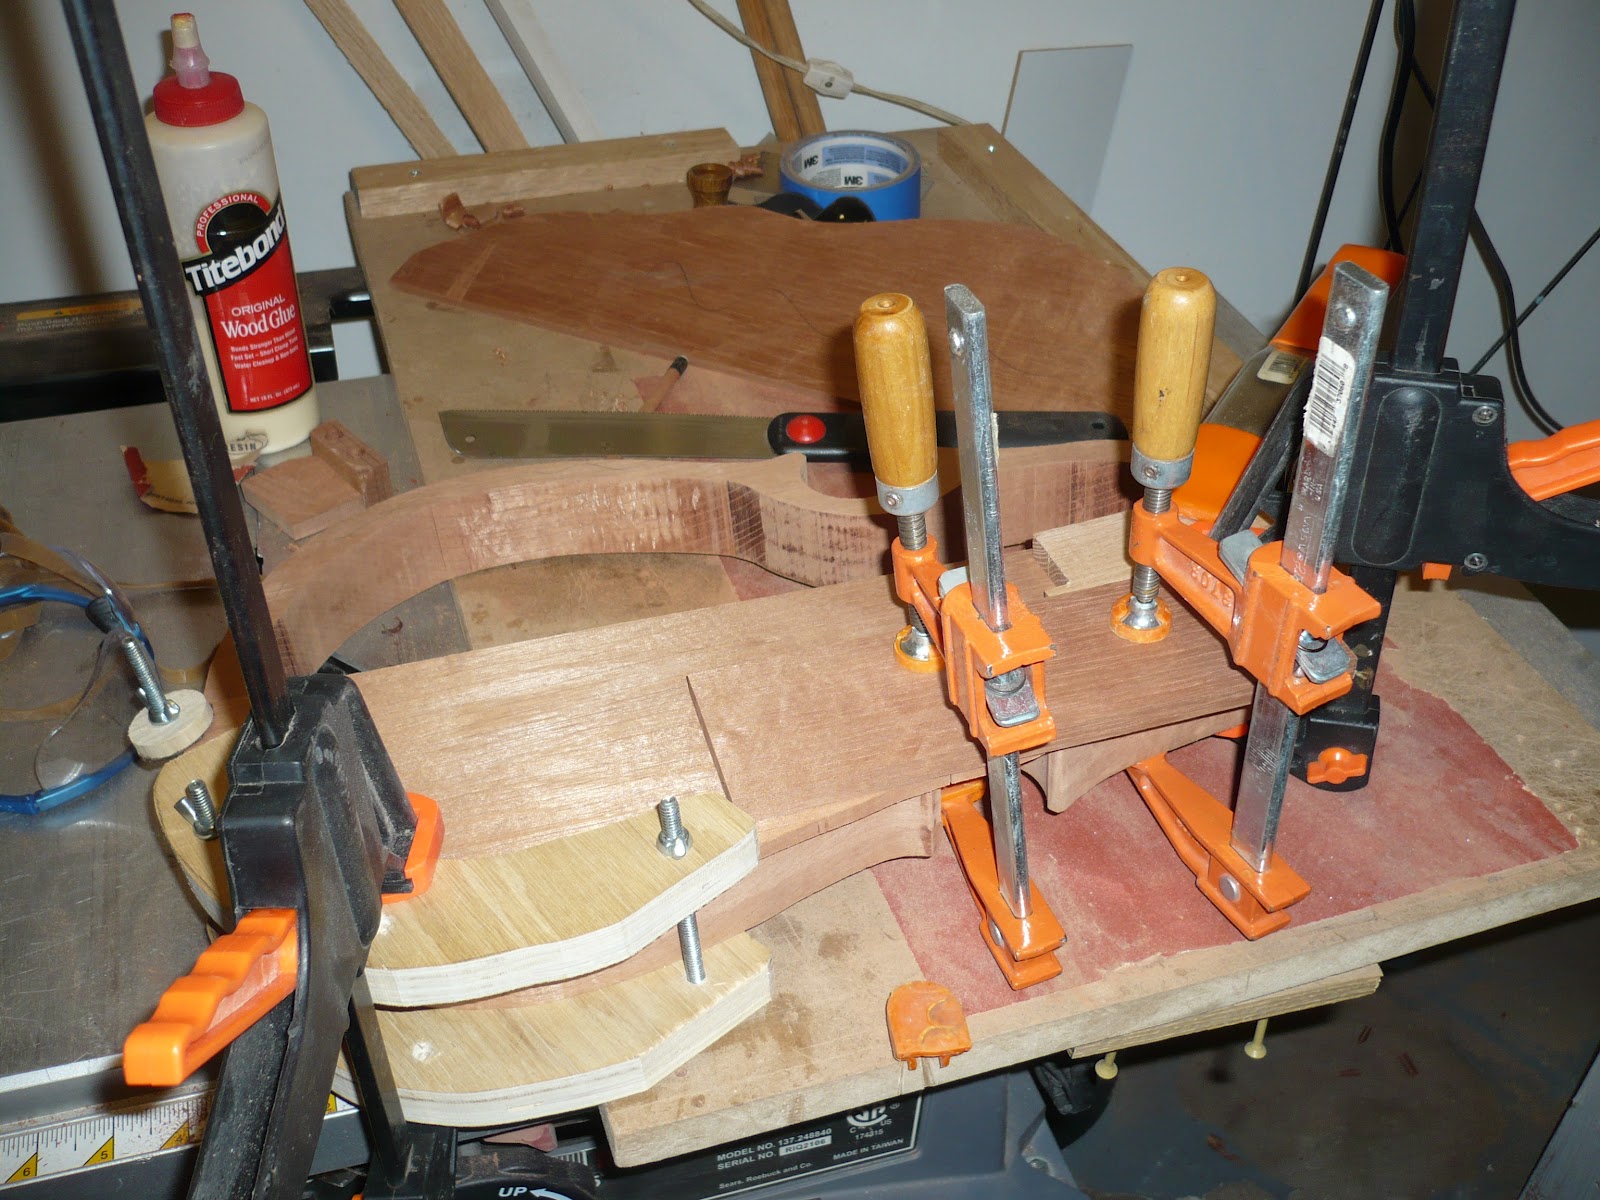
Bridge
While waiting for the Yagrumo to arrive I started carving a bridge from scratch. I took a small piece of walnut and marked it where I wanted to cut. First I rough cut the blank using my band saw and a fence. I used a plane to square everything up. I followed this with using my japanese pull saw.I used a chisel to cut the wedge/angled area. Overall I am pretty happy. I will probably bind it with some maple, just because.
The best part is that I used scraps from other projects, which saved a bit of cash.
A la espera de yagrumo para llegar empecé a tallar un puente desde el principio. Tomé un pequeño trozo de madera de nogal y lo marcó a donde quería cortar. Primero cortar la áspera en blanco con mi sierra de banda y una valla. He utilizado un avión con destino a todo lo cuadrado. He seguido esta con el uso de mi japonés pull saw. Yo utiliza un chisel para cortar la cuña / área en ángulo. En general estoy bastante contento. Yo probablemente lo unen con un poco de maple.


Thursday, August 9, 2012
Yagrumo
Well, I have located some Yagrumo for the top. It should be arriving in a few days.
I love the way this wood looks as a top. This wood is native to Puerto Rico. Now to try and come up with the corpus wood, which is typically Guaraguao. I have located some spanish cedar, which I am told works well for this style instrument.

I love the way this wood looks as a top. This wood is native to Puerto Rico. Now to try and come up with the corpus wood, which is typically Guaraguao. I have located some spanish cedar, which I am told works well for this style instrument.
Yagrumo tree
Saturday, July 21, 2012
I've decided my next project will be a Cuatro puertorriqueño in the post 1920's style body with a "violin" shaped body as opposed to the Cuatro Antiguo with the more key-hole shaped body. As I've been reading, the scale length will be 20.5". So this will probably require me to make a jig to cut the fret slots for this scale. I was thinking Sitka Spruce instead of Yagruma for the top and Spanish Cedar for the corpus. It is tuned B1-E-A-d-g. I will probably have to make the bridge and nut from scratch. A Jig will also be required to drill the headstock for the 5 tuners on each side.
Me decidido que mi próximo proyecto será un Cuatro en estilo de la carrocería del puesto de 1920 con un "violín" cuerpo en forma. Como he estado leyendo, la longitud de la escala serán 20,5 ". Así que esto probablemente me obligará a hacer una plantilla para cortar el traste ranuras para esta escala. Estaba pensando en Sitka en lugar de Yagruma para la parte superior y cedro español para la corpus. se templa B1-EADG. que probablemente tendrá que hacer el puente y la tuerca de la nada. Una plantilla también se requiere para perforar el cabezal de los sintonizadores de 5 en cada lado.

Aquí está una foto en la página web del MET, muy en la línea de lo que me gustaría construir. El Proyecto del Cuatro tiene planes para la venta. Creo que estos se basan en un modelo de William Cumpiano. Paso 1 adquisición de materiales.
Me decidido que mi próximo proyecto será un Cuatro en estilo de la carrocería del puesto de 1920 con un "violín" cuerpo en forma. Como he estado leyendo, la longitud de la escala serán 20,5 ". Así que esto probablemente me obligará a hacer una plantilla para cortar el traste ranuras para esta escala. Estaba pensando en Sitka en lugar de Yagruma para la parte superior y cedro español para la corpus. se templa B1-EADG. que probablemente tendrá que hacer el puente y la tuerca de la nada. Una plantilla también se requiere para perforar el cabezal de los sintonizadores de 5 en cada lado.

Here is a photo on the MET's web site, very much along the lines of what I would like to build. The Cuatro project has plans for sale. I believe these were based on a William Cumpiano model. Step 1 acquire materials.
Aquí está una foto en la página web del MET, muy en la línea de lo que me gustaría construir. El Proyecto del Cuatro tiene planes para la venta. Creo que estos se basan en un modelo de William Cumpiano. Paso 1 adquisición de materiales.
Subscribe to:
Posts (Atom)